How to Create Custom Contact Fields
Custom fields let you tailor contact information to your business needs by adding attributes not available in standard contact forms. This helps you gain quick insights into your contacts—whether customers, vendors, or employees—so you can better plan communication, collaboration, or resource allocation.
With ContactsFlow™ (formerly Shared Contacts for Gmail™) Custom Fields, you can:
- Create unlimited fields that match your business needs.
- Set drop-down options for consistent, selectable values.
- Automatically sync custom fields with Google Contacts.
- Apply uniform labels across all contact cards.
Learn more about custom fields in this article.
Important: Only admins can create, add, edit, or delete custom fields. Collaborators with Editor or higher permissions can add data.
Learn more about permissions in this article.
Steps to Create a Custom Field
- Access Your Dashboard
Open your ContactsFlow™ (formerly Shared Contacts for Gmail™) dashboard.
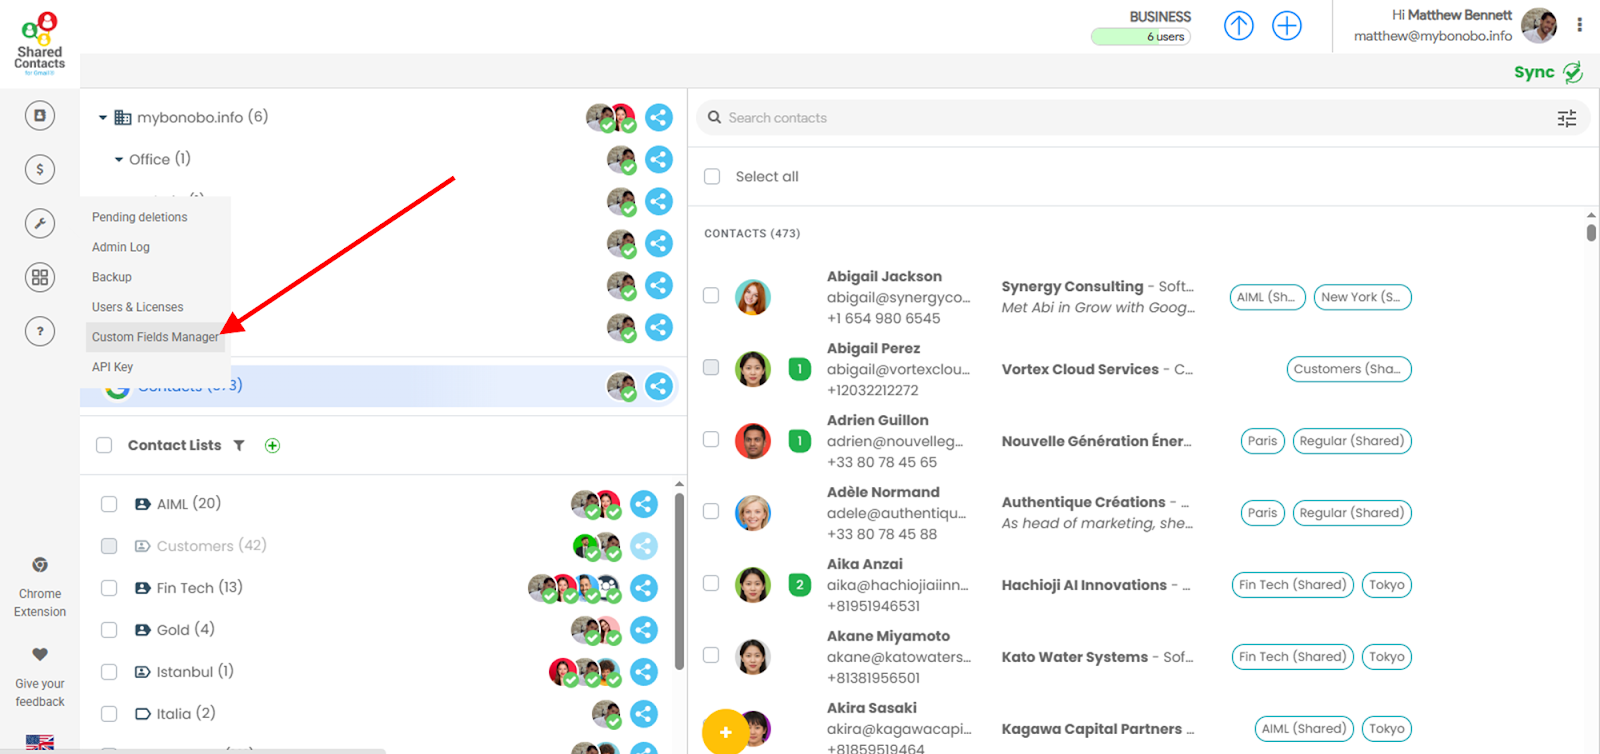
- Go to Settings > Custom Fields Manager
Only admins have access to this.
- Start adding a New Custom Field
Click “Add a New Custom Field”.

- Enter the field name and click “Save”.

- Choose whether the type of custom field would be text or dropdown.
The default setting is ‘text’.

- For a dropdown custom field, click the gear icon on the right side to list the dropdown options.

- Click “Add a new row” to enter values of the dropdown options.

- Click “Save“.

- Repeat the steps 7-8 until all the dropdown options are listed.

Great! Your custom field is ready—now let’s fill in the values.
Steps to Fill Out the Custom Fields:
All collaborators with Editor permission or above can enter values for the created custom field.
1. From the app dashboard, select the contact where you want to enter values for the created custom field.

2. Click the edit icon at the top right corner of the contact card.
Note that the custom field still does not appear on the contact card because it still has no values.
3. Scroll down to the edit mode of the contact card, as the custom field appears at the bottom.

4. As you find the custom field, type in the value for the text type.

5. For dropdown field type, select from the dropdown.

6. Click “Save” to save the changes.

7. Now, everyone who has access to the contact can see the custom field and its field value.

Note:
The custom fields sync with Google Contacts.
Custom fields in ContactsFlow™ (formerly Shared Contacts for Gmail™) empower your team to organize contact data in a way that fits your business operations. By capturing essential metadata like account type, region, project involvement, or preferred communication channels, you and your entire organization work with relevant and actionable contact data.
Start creating custom fields today to turn your contact list into a powerful business intelligence tool.